Image Processing

In this blogpost we are looking into a second feature of ZigSim which uses a video-over-IP protocol called NDI™ to transmit video and audio captured by the device. The data can be received with any NDI client apps – in our case we use vvvv and OpenFrameworks to get familiar with the corresponding workflows.

Setup:

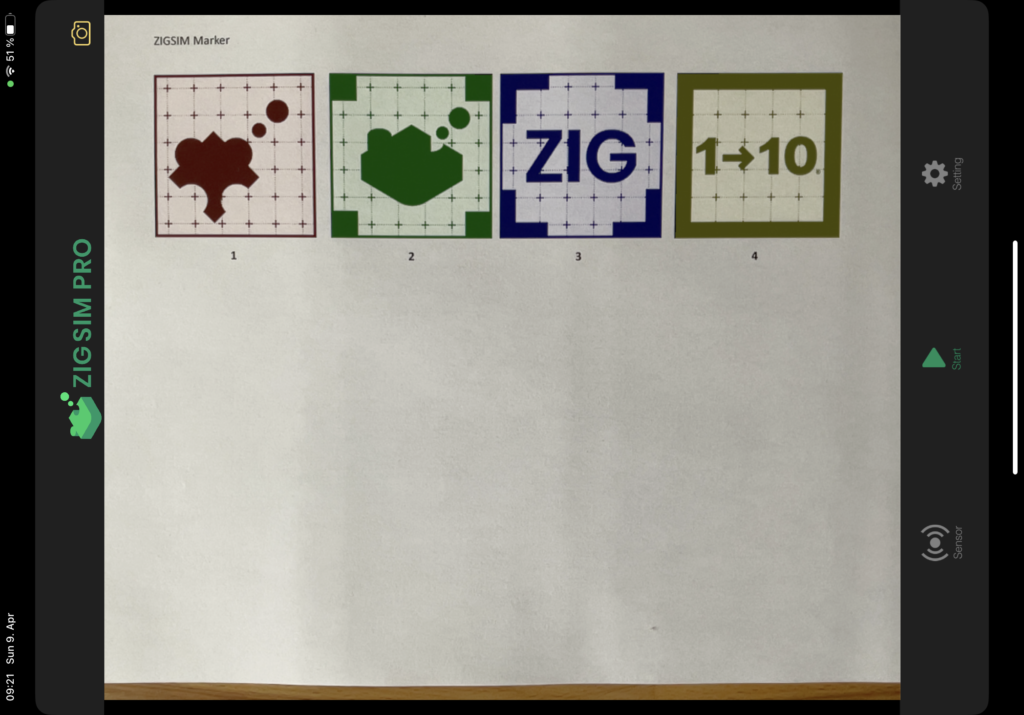
The goal is to setup a connection between our sender (iPad Pro) and receiver (Laptop) to have a second possibility for tracking physical objects via a local network.

First, we need to install the NDI® Tools which can be found here:

https://www.ndi.tv/tools/

They contain several applications (like Test Patterns and Screen Capture) to create NDI Sources on the computer.

For our first test we run the Studio Monitor app and select the broadcast from the ZigSim iOS app.

Note: After some debugging, I found out that ZigSim does not always connect successfully with the computer – without raising an error. So if your device does not show up, just force close the ZigSim app and open it again.

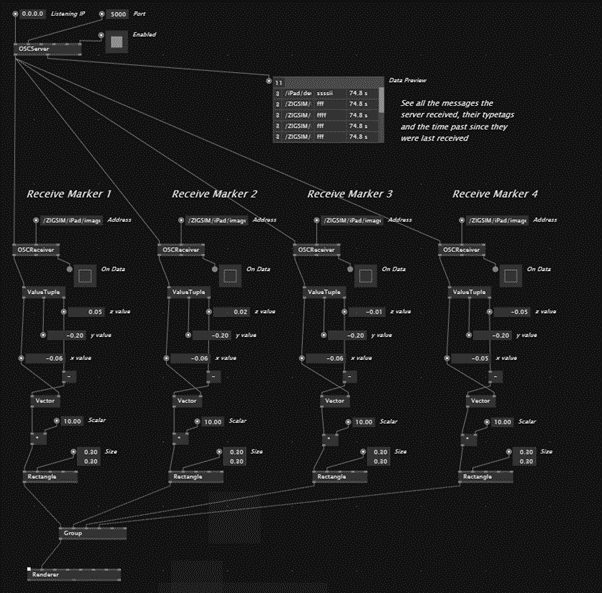
1. Example: Setup for vvvv

For displaying video content within vvvv we need an addon called VL.IO.NDI which can be downloaded under the following link:

https://github.com/vvvv/VL.IO.NDI

Be aware that this addon needs the latest vvvv preview build (5.0) to work properly!

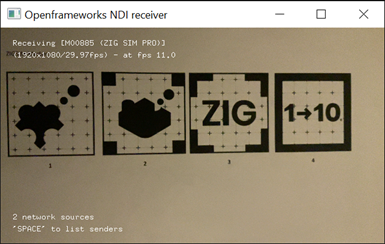
2. Example: Setup for OpenFrameworks

For testing the connection in OpenFrameworks we use the ofNDI addon which can be downloaded under the following link:

https://github.com/leadedge/ofxNDI

After opening the project with the OpenFrameworks project generator we need to build the app in Visual Studio. While running, the app searches for available sources and lets us display the video output within the app.

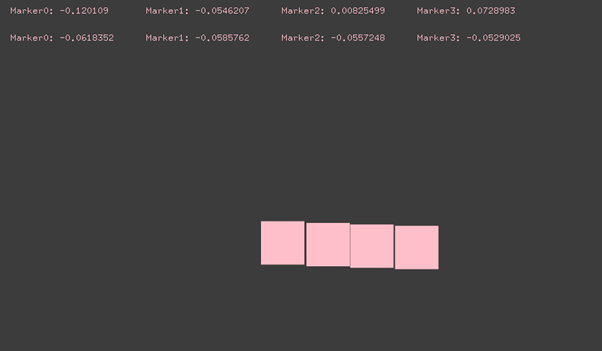
With the help of various image detection, tracking or machine learning tools like TenserFlow or OpenCV this video source can be processed within vvvv or OpenFrameworks.

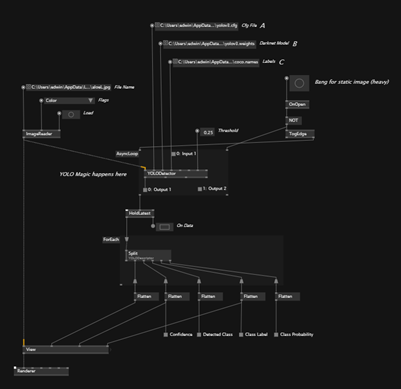
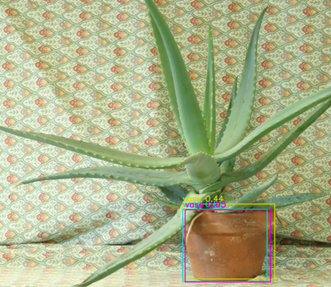
The following prebuild vvvv example shows how the Yolo3 algorithm successfully recognizes objects within a picture. The amount and accuracy depends on the data set which could also be custom made to suite the use case of a given exhibit.

Camera-Based Object Tracking – Part 1

This blogpost is about my first setup for experimenting with camera-based object tracking. I want to explore different tools and technics to get in-depth experience for real time object tracking in 2D and 3D-space.

For my examples I have chosen the following setup:

Hardware:

  • Apple iPad Pro
  • Laptop (Windows 10)

Software:

  • ZigSim Pro (iOS only)
  • vvvv (Windows only)
  • OpenFrameworks
  1. Example: Tracking Marker in ZigSim

As ZigSim uses the inbuild iOS ARKit and calculates the coordinates within the app, we need to follow the documentation on the developer’s homepage.

ARKit in ZigSim has 4 different modes (DEVICE, FACE, MARKER and BODY) – for the moment we are only interested into MARKER-Tracking which can track up to 4 markers.

The marker can be found here: https://1-10.github.io/zigsim/zigsim-markers.zip

OSC Address:

  • Position: /(deviceUUID)/imageposition(MARKER_ID)
  • Rotation: /(deviceUUID)/imagerotation(MARKER_ID)
  1. Example: “Hello World”

In this example we want to establish a connection via the OSC Protocol between ZigSim (OSC sender) and a laptop running vvvv (OSC receiver) which is a visual live-programming environment.

Here you can see the vvvv patch which is a modification of the inbuild OSC example:

  1. Tracking the marker

In our next step we will track the location of four marker via ZigSim, transfer the coordinates to vvvv and draw a rectangle for each marker.

  1. Example: OpenFrameworks

In our last step we will compare the workflow of the node-based environment vvvv with the one from OpenFrameworks which builds on top of the C++ programming language and is being programmed in Visual Studio or Xcode.

void ofApp::update(){
	while (osc.hasWaitingMessages()) {
		ofxOscMessage m;
		osc.getNextMessage(&m);

		if (m.getAddress() == "/ZIGSIM/iPad/imageposition0") {
			osc_0x = m.getArgAsFloat(2) * (-2);
			osc_0y = m.getArgAsFloat(0) * (2);
		}

		if (m.getAddress() == "/ZIGSIM/iPad/imageposition1") {
			osc_1x = m.getArgAsFloat(2) * (-2);
			osc_1y = m.getArgAsFloat(0) * (2);
		}

		if (m.getAddress() == "/ZIGSIM/iPad/imageposition2") {
			osc_2x = m.getArgAsFloat(2) * (-2);
			osc_2y = m.getArgAsFloat(0) * (2);
		}
		
		if (m.getAddress() == "/ZIGSIM/iPad/imageposition3") {
			osc_3x = m.getArgAsFloat(2) * (-2);
			osc_3y = m.getArgAsFloat(0) * (2);
		}
	}
}

Note: While both tools (vvvv and OpenFrameworks) have their own advantages and disadvantages, I am curious exploring both approaches to find the best workflow.