During this semester, I had the opportunity to delve into various ambisonics recording and mixing techniques, which significantly influenced my choice of project for the seminar’s culmination. As I evaluated the array of options presented during the course, I ultimately decided to employ a microphone system optimized for surround recording, coupled with subsequent processing using ambisonics mixing and rendering methods. My initial challenge revolved around selecting the appropriate recording material. Given my interest in capturing natural sounds, I embarked on a quest to find a location distant enough from anthropogenic noises, ensuring I could work with the full spectrum of sound without resorting to equalizers or extensive audio editing. After conducting a thorough survey of the Graz area, I settled on Plabutch as my recording site.
While traversing the hiking trails, I came across a secluded valley that provided an acoustic haven, sheltered from the bustling sounds of traffic and human activity a hidden slice of nature nestled amidst the trees and shrubbery. In Figure 1, you can observe the precise location of the microphone array during the final recording session.
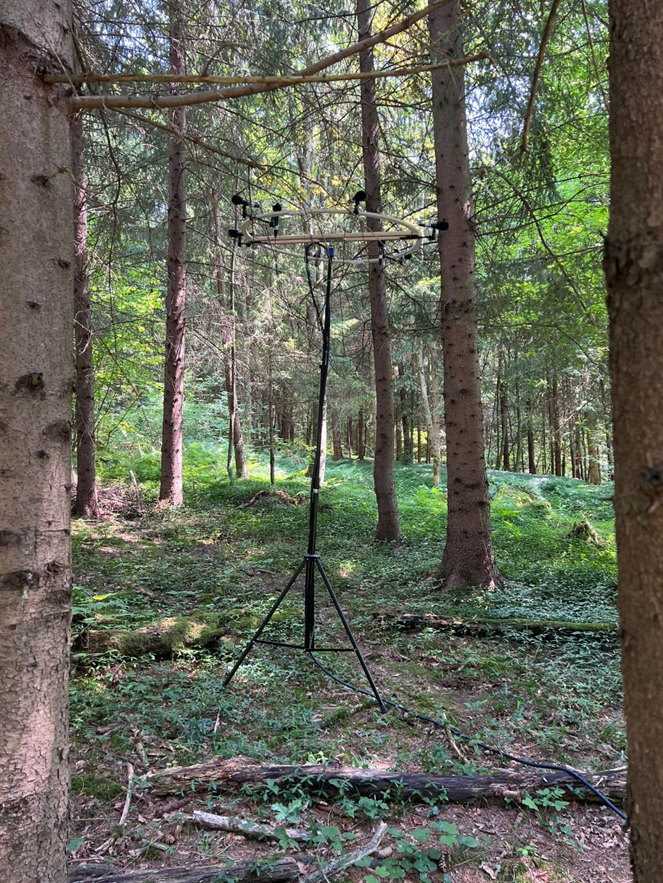
While I successfully located a remote enclave devoid of machinery and modern technology, I, unfortunately, fell prey to the incessant interruption of air traffic, occurring at regular 20-minute intervals. An intriguing facet of this experience didn’t just stem from the realization that it’s increasingly challenging to discover a place devoid of human presence, but also from the contemplation of biodiversity and its daily rhythms. Despite recording for several hours, the acoustic material exhibited minimal timbral variation. With the exception of sporadic migratory bird calls that punctuated the recording, the captured soundscape displayed limited acoustic elements evolving over time. It would be worthwhile to revisit this site at different times of the day, allowing for an analysis of how the fauna changes as hours elapse. As depicted in Fig. 1, I strategically positioned the microphone array directly beneath a nest to inject dynamics into the otherwise constant texture, which was predominantly characterized by the sounds of wind and various types of insects.
On the technical front, I employed an array comprising eight microphones, featuring six cardioid microphones positioned on the horizontal plane and two hypercardioid microphones on the vertical plane:
- 6 * Neumann 148;
- 2 * Neumann 150
In Figure 2, you can observe the graphical representation of the microphone array configuration and its spatial arrangement. The red dots denote the microphones positioned at 90-degree intervals on the horizontal plane, with each microphone situated 60° units apart. Meanwhile, the green triangles symbolize the supercardioid microphones oriented vertically towards the sky.

To facilitate outdoor recording, I employed a portable sound card, namely the Sound Devices MixPre 10. However, I encountered certain challenges during setup. Firstly, there was a lack of suitable anti-pop filters for outdoor recording. Secondly, I faced the issue of capturing a stereo sum of the microphones. Due to insufficient low-frequency filtering, I struggled to achieve the proper gain for an extended dynamic range. Additionally, distinguishing between individual microphones for front-end recording posed difficulties. For my next project, I intend to allocate several days for recording, enabling me to compare different settings on the computer for optimal results.
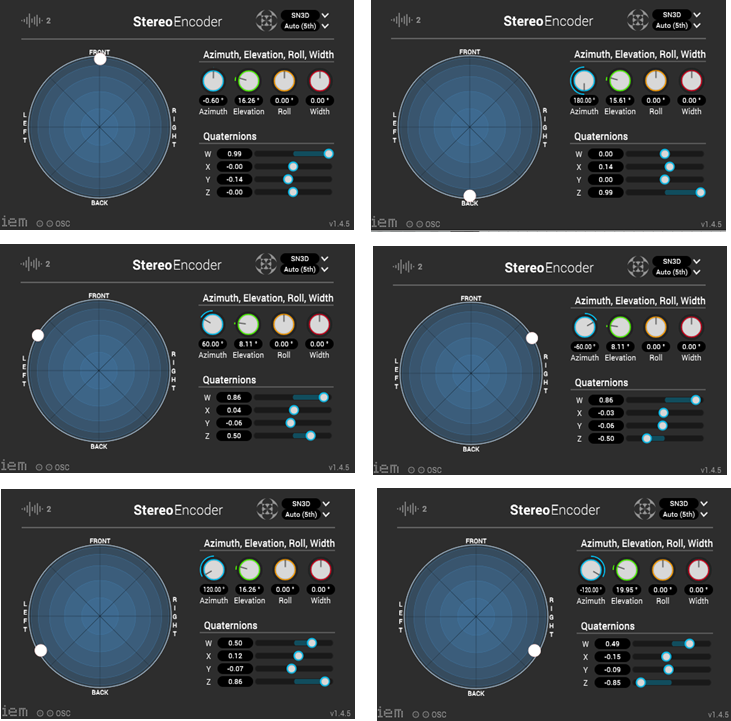
When it came to processing the tracks for ambisonics playback, I opted for Reaper as my digital audio workstation (DAW) due to its versatility and ease of configuring multichannel projects. Initially, I created a master track for binaural headphone playback and subsequently established eight mono tracks for the corresponding microphones. To recreate an authentic sound scene, I used StereoEncoders (Fig. 3) to position the sources of the respective tracks according to their original recording positions. The order I used is the 5th one, even though thanks to different listening tests made during the semester, a third one would have been more than enough.
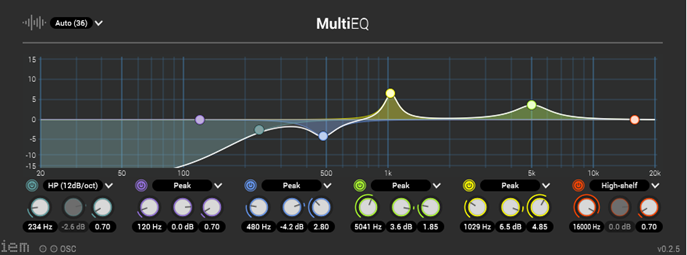
After panning the various microphones, I employed a MultiEQ to remove unwanted frequencies. For the horizontal plane, I applied a 60Hz low-cut filter to all tracks, and for the two pointing upward, I used a 250Hz filter to enhance spatial localization by cleaning the low register. As I mixed exclusively through headphones, I further accentuated vertical localization by boosting frequencies at 1 kHz and 5 kHz by 4 dB and 5 dB, respectively, to emphasize chirps and elevate the sound sources localization (Fig.4).